



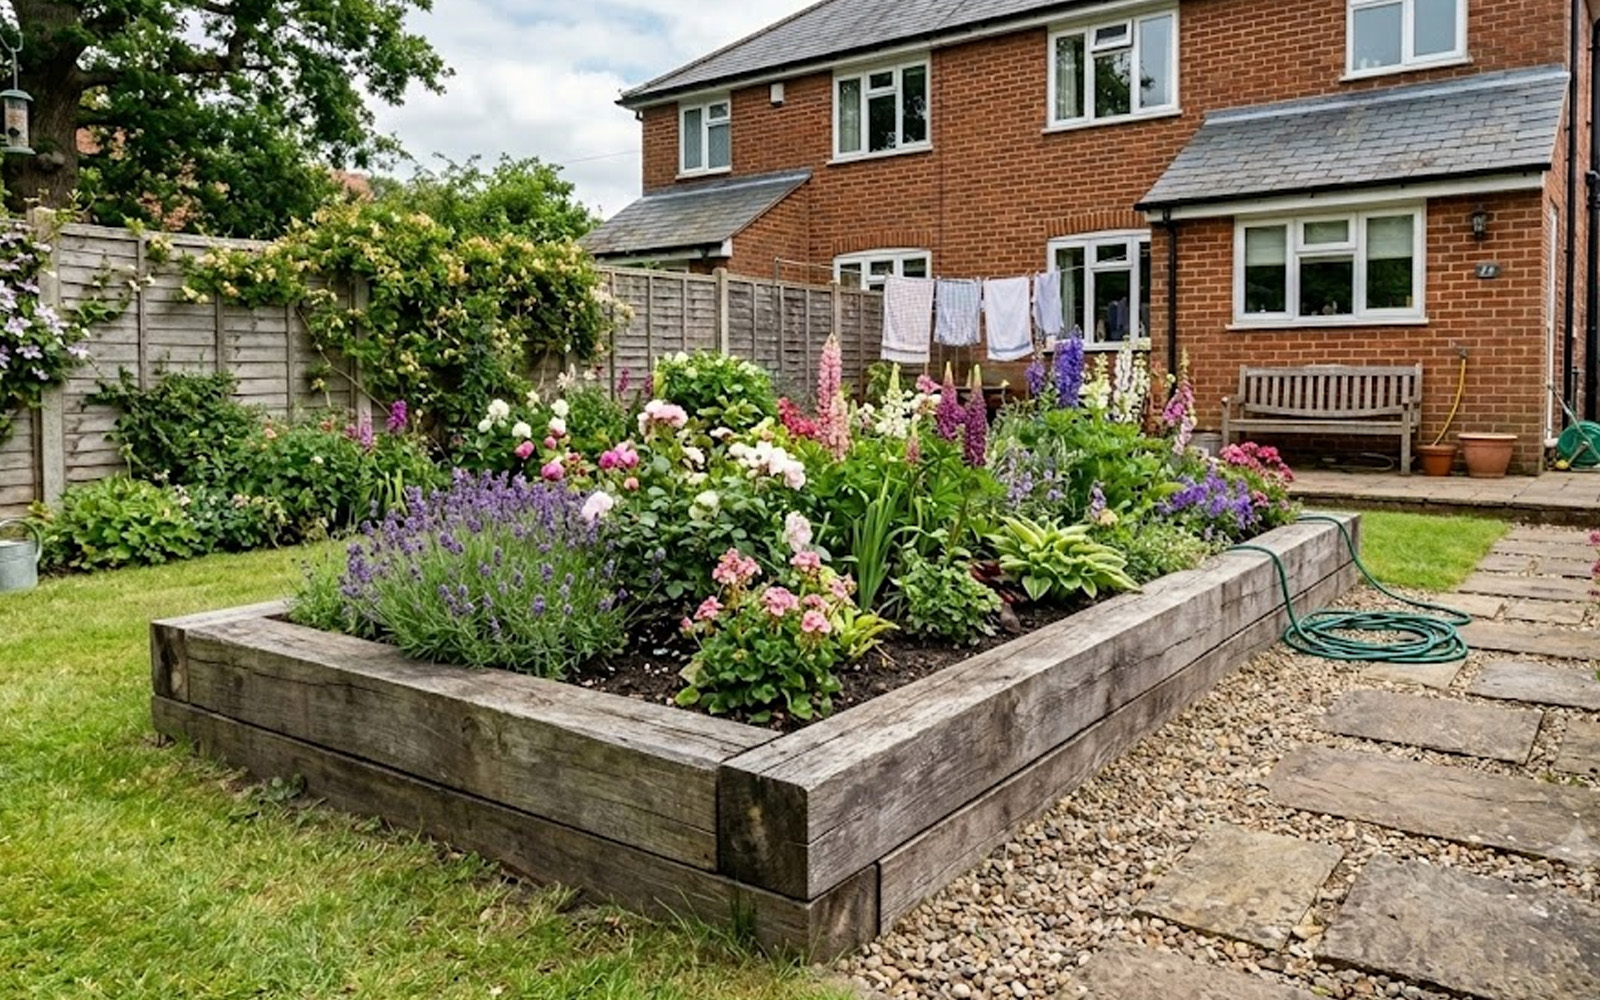
How to Build a Raised Bed with Railway Sleepers
Raised beds are one of the most rewarding DIY projects you can tackle in a Northern Ireland garden. They give you complete control over your soil, improve drainage (which is crucial on our heavy clay and waterlogged ground), and make growing vegetables, herbs and flowers far more productive. Railway sleepers are the most popular choice for building them: they're strong, look great and last for decades.
This guide walks you through everything, from choosing the right sleepers to filling and planting your finished bed. Whether you're working with a small courtyard or a large garden, the principles are the same.
Planning Your Raised Bed
Choosing a Location
Most vegetables and flowers need at least six hours of direct sunlight per day, so pick the sunniest spot available. Avoid areas directly beneath trees, roots can compete with your plants and overhanging branches will reduce light and increase moisture. In a small garden, a south or west-facing fence or wall provides useful reflected heat. Think also about access to water. Raised beds can dry out faster than ground-level soil in summer, so being close to a tap or water butt makes a real difference. In Northern Ireland, summer rainfall is often enough to maintain moisture, but a dry July can still put stress on crops without supplemental watering.
Deciding on Size and Height
The golden rule for width is that you should be able to reach the centre of the bed comfortably from both sides without stepping into it, typically no more than 1.2 metres (4 feet) wide. Length is entirely up to you and your available space. For height, a single sleeper layer (around 125mm) works well for ornamental planting or where your existing soil is reasonable. Two sleeper layers (around 250mm) gives more root depth and is ideal for vegetables. Three layers (around 375mm) is excellent for deep-rooted crops and allows proper soil conditioning even over concrete or compacted ground.
NI Drainage Tip
Northern Ireland's heavy clay soils and high rainfall mean raised beds give a significant growing advantage. The elevated profile improves drainage naturally, and you can fill with a customised free-draining growing mix rather than battling with compacted, waterlogged ground.
What You'll Need
Before you start, gather all your materials. Having everything on site avoids costly delays mid-build.
| Tools | Materials |
|---|---|
|
|
Choosing Your Sleepers
New vs Used
New softwood sleepers (typically Scandinavian pine, pressure treated) are widely available, straight, and easy to work with. They typically last 15–25 years when in ground contact. New hardwood sleepers (oak, sweet chestnut) cost more but can last 30–50 years with minimal treatment. Used or reclaimed railway sleepers have a popular rustic look. However, genuine old British Rail sleepers were treated with creosote, a coal tar-based preservative that is a known carcinogen. For ornamental beds, creosote-treated sleepers are generally acceptable. For vegetable growing, use new untreated or water-based preservative-treated sleepers, or line the inside of the bed with heavy-duty polythene before filling.
⚠️ Creosote Warning
Do not use old creosote-treated railway sleepers for growing edible crops. The chemicals can leach into soil over time. If in doubt, opt for new pressure-treated pine sleepers or use a thick polyethylene liner on the inside faces. MacBlair stocks FSC-certified new sleepers in both softwood and hardwood.
| Sleeper Type | Best For |
|---|---|
| New softwood (treated pine) | All raised beds, best value, easy to cut |
| New hardwood (oak/chestnut) | Long-lasting ornamental or veg beds, premium look |
| Used/reclaimed (creosote-treated) | Ornamental beds only, not for edible growing |
| Untreated green oak | Natural look, oils naturally resist rot, no chemicals |
| Composite sleepers | Very long life, good for heavy-use or commercial settings |
Step-by-Step Build Guide
Step 1: Mark Out and Prepare the Ground
Use canes and string to mark out the perimeter of your raised bed. Check it's square by measuring the diagonals, they should be equal. Cut any lawn or turf within the marked area using a sharp spade. If building over grass or weeds, lay the first layer of sleepers directly on the ground and use them as the barrier, no need to excavate. If building on compacted soil or a patio, clear any debris that would prevent the first layer sitting flat. Use a spirit level on the ground. If there's a noticeable slope, dig the higher side down slightly so the first sleeper course sits level. This is important for both appearance and for water distribution once the bed is planted.
Step 2: Lay the First Course of Sleepers
Place the first sleepers around the perimeter of your marked area. Butt the ends tightly together at each corner. For a standard rectangular bed with sleepers running lengthways, the two long sides will sit inside the two short ends, or you can alternate the overlap at each corner for a more decorative look. Check each sleeper is level along its length and across to the opposite side. Adjust by adding or removing soil beneath. Don't rush this stage. A level first course makes every layer above easier to build.
To anchor the base and stop it moving outwards under the weight of the soil, you have two options. The traditional method is to drive a 600mm length of rebar (12–16mm diameter) through a pre-drilled hole at each corner and into the ground. The sleeper support method uses purpose-built metal ground spikes. These are driven directly into the ground flush with the timber, allowing you to simply screw the bracket into the wood, no heavy drilling required. If using metal spikes, place a timber offcut in the collar when hammering to prevent distorting the bracket.
Step 3: Build Up the Remaining Courses
For a two-layer bed, place the second course of sleepers on top of the first, staggering the joints like brickwork so that no vertical joint lines up between layers. This creates a far stronger, more rigid structure. You can secure these upper courses using either heavy-duty timber screws or metal sleeper supports.
The Screw Method: Pre-drill pilot holes through the top sleeper and into the one below (a 6mm bit works well), then drive 150mm structural timber screws down at roughly 600mm intervals. Two screws per sleeper, positioned 150mm from each end, is usually sufficient. For corners, drive a screw at 45 degrees through the end of one sleeper into the face of its neighbour. Repeat for a third course if desired, checking the whole structure is square and level before proceeding.
The Bracket Method: If you want to avoid drilling long pilot holes or need extra reinforcement against bowing, metal connector plates are an excellent alternative. Apply flat plates across the horizontal seams on the inside faces of the bed. For the corners, heavy-duty right-angle brackets tie the timbers together quickly and securely. These are fixed using standard exterior wood screws, making alignment straightforward.
Step 4: Line the Base and Inside Faces
Lay weed suppressant membrane across the entire base of the bed, overlapping the edges and stapling or pinning it to the inside faces of the sleepers. This prevents weeds from pushing up from below without inhibiting drainage. If you're growing edible crops and using treated sleepers, line all four inside faces with heavy-duty black polythene sheeting, folding neatly at the corners and fixing with a staple gun. Leave the base open or use membrane, you need drainage, not a sealed waterproof liner. Add a 50–75mm layer of coarse grit or gravel over the membrane at the base. This prevents soil from washing down, improves drainage, and discourages slug movement from below.
Step 5: Fill with Growing Mix
The quality of your fill mix is the most important factor in how well your raised bed performs. A standard recommendation is:
- 60% good quality topsoil
- 30% compost (garden compost, green waste compost, or well-rotted farmyard manure)
- 10% sharp sand or coarse grit (to aid drainage in heavier mixes)
MacBlair stocks bulk bags of screened topsoil and multipurpose compost. For a standard 1.2m × 2.4m bed at two-sleeper height, you'll typically need around 700–800 litres of fill mix. Fill in stages, firming gently with your hands every 200mm or so to eliminate air pockets. Leave around 50mm of space at the top to allow for settling and to prevent soil washing over the sides in heavy rain.
Step 6: Water In and Leave to Settle
Once filled, water the bed thoroughly, this helps the mix settle and compact naturally. Top up any areas that sink significantly. Leave for at least 24 hours before planting in spring; if filling in autumn, the bed can be left to settle over winter before planting. In Northern Ireland's wet spring climate, newly filled beds can become waterlogged if left without cover during prolonged rainfall. If you're not planting immediately, cover with a sheet of polythene or a breathable membrane to prevent compaction and nutrient loss.
Step 7: Add Finishing Touches and Plant Up
With the bed filled and settled, you're ready to plant. Consider adding a layer of bark mulch around plants to suppress weeds and retain moisture. Particularly useful in the first season before plants become established. For the sleepers themselves, a coat of exterior wood oil or decking oil on the exposed top faces will improve appearance and slow weathering. Avoid painting or heavily varnishing softwood as it tends to peel. If you've used untreated oak, no treatment is needed; it will develop a natural silver-grey patina over time. Fix a simple drip irrigation line along the inside of the bed connected to a timer for trouble-free watering through dry spells, especially useful if growing salad crops or soft fruit that need consistent moisture.
Sleeper Sizing and Quantities Reference
| Bed Size | 1 Layer | 2 Layers | 3 Layers | Fill Volume (2L) |
|---|---|---|---|---|
| 1.2m × 1.2m | 4 sleepers | 8 sleepers | 12 sleepers | ~350 litres |
| 1.2m × 2.4m | 6 sleepers | 12 sleepers | 18 sleepers | ~700 litres |
| 1.2m × 3.6m | 8 sleepers | 16 sleepers | 24 sleepers | ~1,050 litres |
| 1.5m × 3.0m | 8 sleepers | 16 sleepers | 24 sleepers | ~1,100 litres |
| 2.0m × 4.0m | 12 sleepers | 24 sleepers | 36 sleepers | ~2,000 litres |
Note: sleeper quantities assume standard 2.4m length sleepers. Fill volumes are approximate and based on two-layer height (~250mm internal depth). Ask at your local MacBlair branch for help calculating materials for your specific project.
Common Mistakes to Avoid
- Building too wide. If you can't reach the middle without stepping in, you'll compact the soil and undo all your drainage work. Stick to 1.2m maximum width or 0.6m if it only has access from one side.
- Skipping the weed membrane. Without a barrier at the base, perennial weeds like dock and bindweed will push up through the fill soil within a season. Take the extra 20 minutes to lay membrane, it pays back every year.
- Not staggering or securing the joints properly. Aligning joints between courses creates a weak point that can splay outward under soil pressure. Offset joints by at least 600mm between layers, and ensure corners are tightly bound using either angled structural screws or sturdy corner brackets.
- Overfilling to the top. A bed filled right to the brim will shed soil in heavy rain. Leave 50mm of headroom and top up after the first season's settling.
- Using creosote sleepers for vegetables. Even if you can't detect the smell, old creosote-treated sleepers can leach chemicals over many years. Use new treated softwood or line with polythene if in any doubt.
- Ignoring drainage below the bed. If your garden sits on clay and drains poorly, consider digging a shallow drainage trench along one side of the bed or adding a soakaway, so water doesn't pond around the base of the sleepers.
Frequently Asked Questions
No. Raised beds are classed as garden features rather than structures and don't require planning permission in Northern Ireland. Even those at three-sleeper height fall well below any threshold. The exception would be if you are in a designated conservation area and want to raise the bed high enough that it becomes wall-like, in that case, check with your local council.
New pressure-treated softwood sleepers in ground contact typically last 15–25 years. New hardwood (oak, sweet chestnut) can last 30–50 years. Reclaimed creosote-treated sleepers have a variable lifespan depending on their age and condition. Keeping the tops oiled and ensuring good drainage around the base will extend the life of any type.
Yes. On a gentle slope, simply dig the higher side down a little so the first course sits level, and fill up from the lower side. On steeper slopes, a stepped arrangement of two or three beds at different heights is more practical and looks better than trying to level a single large bed across a significant fall.
A mix of 60% quality topsoil, 30% compost (garden compost or well-rotted manure), and 10% sharp sand performs well across most vegetables. For root crops like carrots and parsnips, increase the sand content to 20% for a lighter, stone-free mix. MacBlair stocks screened topsoil and compost in bulk bags suitable for raised bed filling.
The elevated position already helps reduce slug pressure compared to ground level. Additional measures include placing copper tape around the outside of the top sleeper course, using wool pellet mulch, and encouraging natural predators like ground beetles by leaving some rough areas nearby. Avoid slug pellets containing metaldehyde, they're harmful to wildlife including hedgehogs and birds.
Ready to Build Your Raised Bed?
MacBlair stocks new softwood and hardwood railway sleepers, weed membrane, topsoil, compost and all the fixings you need. Available at our branches across Northern Ireland. Visit macblair.com or call into your nearest branch for expert advice and competitive trade pricing.