



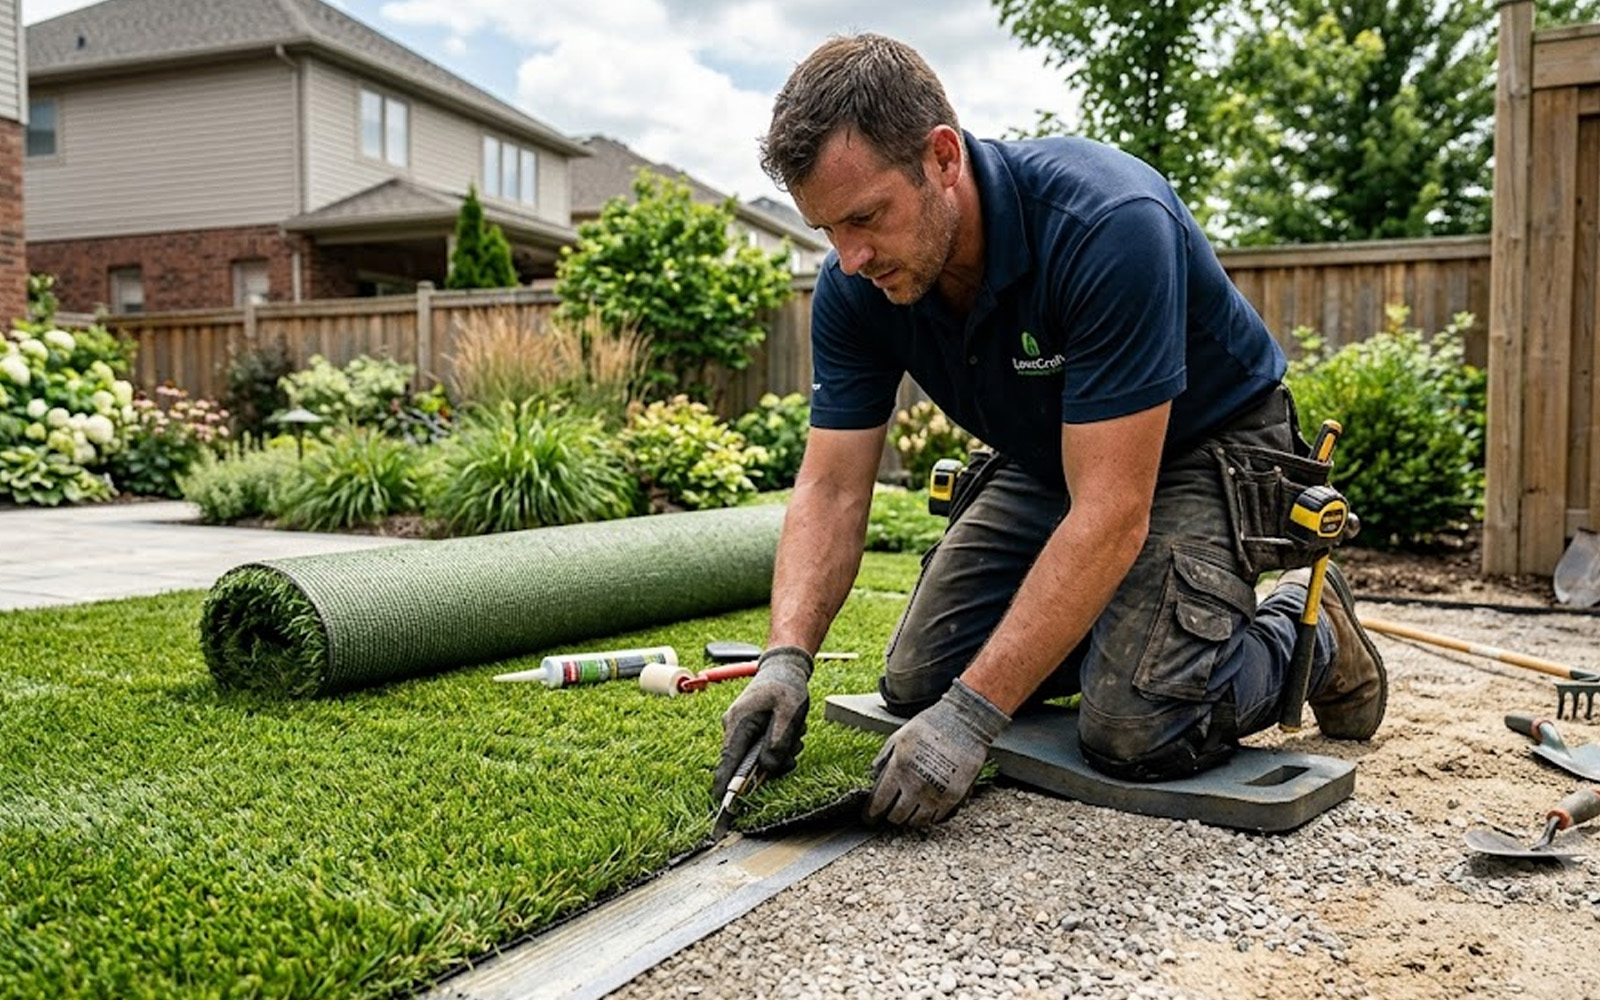
How to Lay Artificial Grass: A Step-by-Step DIY Guide
Artificial grass has come a long way. Modern artificial turf looks remarkably realistic, stays green year-round, and can genuinely transform a garden that's struggling with shade, heavy use, or the constant dampness that comes with a Northern Ireland climate.
Laying it yourself is well within reach for most DIYers, the job is more about preparation and patience than technical skill. Get the base right and the rest follows naturally. Rush the groundwork and you'll end up with a surface that drains poorly, looks uneven, or lifts at the edges within a season.
This guide walks you through the entire process from start to finish: choosing the right grass, preparing the ground, laying the sub-base, installing the turf, and making it look seamless.
Good to know
Most artificial grass installations in a domestic garden don't require planning permission in Northern Ireland. However, if your front garden is being fully covered with impermeable surfaces including artificial grass, check your local council's guidelines on surface water drainage. Installing a sub-base with drainage aggregate, as described in this guide, will satisfy most drainage requirements.
Choosing the Right Artificial Grass
Not all artificial grass is the same. The main variables are pile height (how long the fibres are), density (how many fibres per square metre), and the blade shape (flat, C-shaped, or W-shaped profiles). For most garden lawns, a pile height of 30–40mm gives the most natural look and comfortable underfoot feel. For areas with heavier use such as children's play areas, dog runs, or paths, a shorter, denser pile (25–30mm) will hold up better over time.
| Pile Height | Best Use | Notes |
|---|---|---|
| 10–20mm | Rooftop terraces, balconies, high-traffic areas | Very short, dense, hardwearing |
| 25–30mm | Paths, pet areas, busy family gardens | Practical and durable, a popular mid-range choice |
| 35–40mm | Main lawns, patios, decorative areas | Lush appearance, good underfoot feel, most popular for lawns |
| 40mm+ | Decorative and prestige installations | Softest feel, most realistic look, less hardwearing in heavy use |
Bring a sample home before you buy if you can. Artificial grass looks different in a showroom under artificial light versus outside in a Northern Ireland garden on an overcast day. The colour and texture can vary more than you'd expect.
Artificial grass and pets
If you have dogs, look for a product specifically rated for pet use. These have a more open backing that allows urine to drain through more freely, and fibres that are easier to clean. Standard artificial grass can retain odours if not specified for pet use.
What You'll Need
| Tools | Materials |
|---|---|
|
|
How much grass do you need?
Measure your area carefully in metres (length x width). Add 100mm to each edge for trimming. If your area isn't square, split it into rectangles, calculate each and add them together. Always buy a little more than your minimum calculation, wastage on cuts and joins adds up quickly, and you can't always match a dye lot if you need more later.
How to Lay Artificial Grass: Step by Step
STEP 1: CLEAR AND EXCAVATE THE AREA
Start by removing all existing vegetation such as turf, weeds, plants and roots. This is the most labour-intensive part of the job but it's non-negotiable. Any organic material left in the ground will decompose over time, causing the surface above to sink and become uneven. Excavate the area to a depth of approximately 100mm (around 4 inches). This gives you room for your sub-base layers and the grass itself. Dispose of the soil and vegetation. Don't leave it piled beside the area as it will eventually get disturbed back in. NI note: If your garden has poor natural drainage or sits on heavy clay, this is the time to address it. Consider digging down an extra 50mm and laying a drainage channel at the lowest edge. Northern Ireland gardens with poor drainage will cause pooling on the artificial grass surface if the sub-base isn't built with drainage in mind.
STEP 2: LAY THE WEED CONTROL MEMBRANE
Once the ground is clear and level, lay a weed control membrane across the entire excavated area before adding your sub-base. This is a step some guides skip - don't. Without a membrane, weeds will push up through your sub-base over time, creating bumps in the finished surface. Overlap sheets of membrane by at least 150mm where joins occur. Secure the membrane temporarily with pins while you add the hardcore on top.
STEP 3: INSTALL THE SUB-BASE
Spread a layer of MOT Type 1 hardcore (compacted crushed stone) approximately 75mm deep over the membrane. Rake level, then compact thoroughly with a plate compactor. Go over the area twice in perpendicular directions. On top of the compacted hardcore, spread a 25mm layer of sharp sand. Screed it level using battens and a long straight edge. Check with a spirit level and ensure you have a very slight fall (1:80 minimum) so water drains away from buildings and doesn't pool. This two-layer base, compacted hardcore plus a sharp sand blinding layer, is what gives your artificial lawn its stability, drainage, and level surface. Don't be tempted to skip the compaction stage. An uncompacted base will settle unevenly after the first rain.
STEP 4: FIT THE PERIMETER EDGING
Before laying the grass, install perimeter edging around the boundary of the area. You can use pressure-treated timber bender boards, aluminium edging strips, or concrete edging. The edging serves two purposes: it gives the grass a defined, neat edge to butt up against, and it prevents the grass edges from lifting or curling over time. Fix the edging securely into the compacted base. The top of the edging should sit flush with or very slightly above the finished grass level.
STEP 5: ROLL OUT AND POSITION THE GRASS
Unroll the artificial grass and lay it across the prepared area. Leave it to acclimatise for at least 30 minutes before trimming, especially on a warm day, as the material can expand slightly. If you've bought the grass in a roll, the pile (the direction the fibres lean) will run in one direction. Check this before you position it: the pile should lean away from the main viewing direction for the most natural look. If you're joining two pieces of grass, ensure both pieces have their pile running in the same direction. Joins that go against the pile direction will be highly visible. Leave at least 50–100mm of excess grass overhanging each edge, you'll trim this to fit precisely in the next step.
STEP 6: TRIM TO FIT
Using a sharp carpet knife or utility knife and a straight edge, trim the grass to fit precisely within your edging. Cut from the back of the grass where possible as it gives a cleaner cut and avoids cutting through the pile fibres on the front surface. For curved edges, use a chalk line or flexible batten to mark your cut line on the back of the grass before cutting. Take your time. A ragged cut edge is very noticeable on the finished lawn.
STEP 7: JOIN SECTIONS (IF REQUIRED)
If your area requires two or more pieces of grass, joins need to be made carefully. Trim both edges so they butt tightly together with no gap and no overlap. Run a strip of artificial grass joining tape underneath the join, centred beneath both edges. Apply artificial grass adhesive to the tape, press both edges down firmly, and weight the join for at least an hour while the adhesive sets. A well-made join should be virtually invisible once the grass is brushed up.
STEP 8: SECURE THE EDGES AND ADD INFILL
Secure the perimeter edges of the grass with galvanised nails or a heavy-duty staple gun into the timber edging, spacing fixings approximately 150–200mm apart. This stops the grass shifting or lifting at the edges. Finally, spread kiln-dried sand infill evenly across the surface using a stiff brush or a specialist power brush. Work the sand into the base of the pile. This adds weight to keep the grass flat, helps the fibres stand upright, and improves the underfoot feel. Brush the pile in different directions to lift the fibres and give the grass an even, natural appearance. Stand back, admire your work, and resist the urge to tell everyone it's not real grass.
Keeping Your Artificial Grass Looking Good
Artificial grass is low maintenance but it isn't zero maintenance, especially in Northern Ireland where rainfall and mild temperatures create good growing conditions for moss and algae.
- Brush regularly: Brush the pile upright every few weeks with a stiff brush or power broom. This keeps the grass looking its best and prevents the fibres from matting flat.
- Rinse occasionally: A hose-down every few weeks keeps dust, pollen and debris from building up in the pile. Your Northern Ireland rainfall will do a lot of this for you automatically.
- Treat for moss and algae: Apply a moss killer or artificial grass cleaner in spring and autumn to prevent the green build-up that's common in shaded NI gardens. A diluted mixture of water and white vinegar also works well as a preventative treatment.
- Deal with debris quickly: Remove fallen leaves, pet waste and any organic matter as soon as possible. Left to break down in the pile, organic material creates the conditions for moss and odour.
Frequently Asked Questions
Yes. A properly installed artificial grass system with a compacted hardcore sub-base and sharp sand blinding layer drains freely. Most modern artificial grass has a perforated backing that allows water to pass through. The key is the quality of your sub-base preparation.
Modern artificial grass is non-toxic and completely safe for children to play on. Look for products that are EN71-compliant (European toy safety standard) if you're installing specifically for a children's play area.
Quality artificial grass is UV-stabilised to resist fading. Cheaper products can fade noticeably within a few years. In Northern Ireland's climate where intense sunshine is fairly limited, UV fading is less of a concern than in sunnier climates.
Yes. Artificial grass can be laid on a solid base like concrete or decking without a sub-base preparation. Ensure the surface is clean and level, fix the perimeter edging securely, and use adhesive or fixings appropriate to the surface.
A quality artificial grass product installed on a proper sub-base should last 15–20 years with regular maintenance. Cheaper products or poor installation will significantly reduce this lifespan.
Get Your Artificial Grass and Materials from MacBlair
MacBlair stocks artificial grass, weed control membrane, hardcore, sharp sand, joining tape, infill and all the edging materials you need to complete your project. Our team across Northern Ireland branches can help you choose the right product for your garden and calculate exactly how much you need.
→ Shop Artificial Grass & Landscaping Supplies at MacBlair.com