



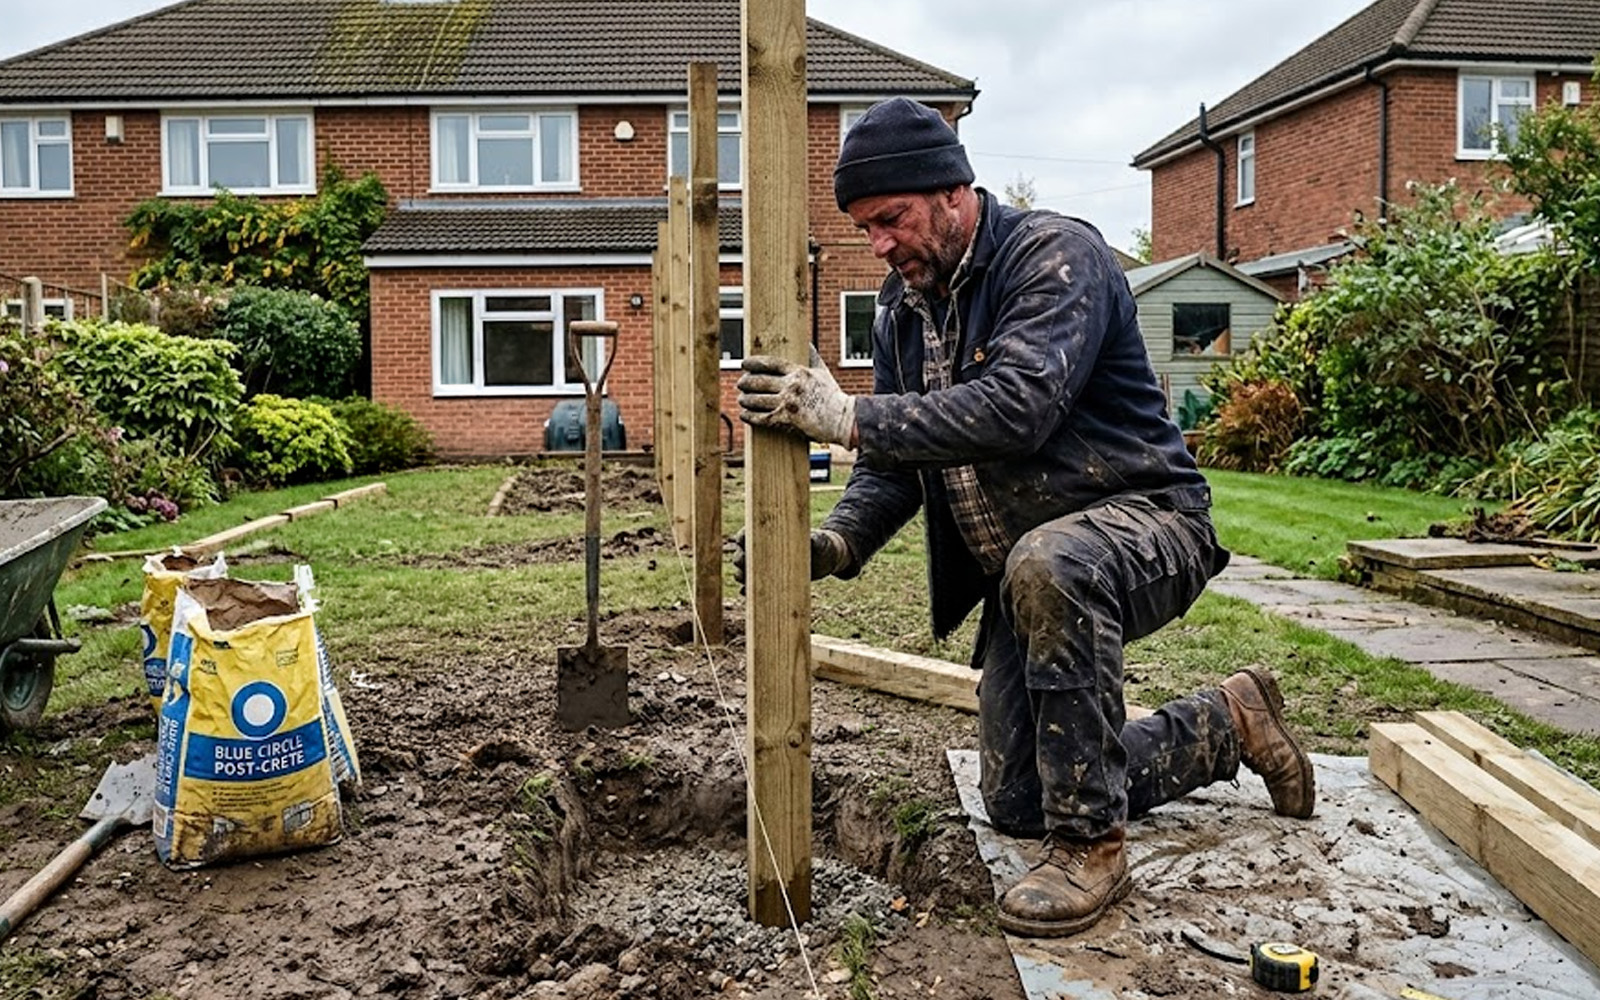
How to Install Fence Posts: A Complete DIY Guide
Installing fence posts correctly is the most important part of any fencing project. Get the posts right and the panels, boards or rails will fall into place. Get them wrong and the entire fence will lean, rot prematurely, or blow down in the first winter storm. A real risk in Northern Ireland where Atlantic weather systems bring sustained winds, heavy rain and ground saturation for much of the year.
This guide covers everything: choosing the right posts and fixing method, planning your line, concreting in, and common pitfalls to avoid. Whether you're replacing a blown section or fencing a garden from scratch, the process is the same.
Planning Before You Start
Check Your Boundaries
Before ordering a single post, confirm where your boundary actually sits. Erecting a fence even a few centimetres inside your neighbour's land can create legal disputes. Check your Land Registry title documents, in Northern Ireland these are available through Land & Property Services (LPS). If in doubt, speak to a solicitor or agree the line in writing with your neighbour before starting. Also check which side the fence is on. The side from which you can see the post and rail structure is typically the 'back' of the fence, and by convention (though not law) is usually the owner's side. Clarify this with your neighbour to avoid any misunderstanding later.
Do You Need Planning Permission?
In Northern Ireland, fences up to 2 metres high generally don't require planning permission under permitted development rights, unless your property is in a conservation area, an Area of Outstanding Natural Beauty, or the fence is adjacent to a road (where the limit drops to 1 metre). Always check with your local planning authority if you're unsure. Belfast City Council and the other councils all provide planning guidance online.
Locate Underground Services
Before digging any holes, call Dial Before You Dig (0800 096 8677) or use the online service to identify buried gas, electricity, water and telecoms services. Many insurance claims and serious injuries result from unexpected cable and pipe strikes during garden work. This step takes 20 minutes and could save your life.
⚠️ Important: Check for Underground Services
Northern Ireland Water, NIE Networks and other utilities have mapped infrastructure throughout the province. Striking a buried cable or pipe during post installation is a real risk. Always call Dial Before You Dig before any excavation, the service is free and typically responds within 24 hours.
Choosing Your Posts
Post selection comes down to material, size and fixing method. Each affects the cost, lifespan and complexity of the job.
Timber Posts
Pressure-treated softwood is the most common choice for domestic fence posts in Northern Ireland. The UC4 hazard class (suitable for ground contact in normal conditions) is the minimum specification, avoid untreated or UC3-only treated posts in ground contact as they'll rot within a few years in our wet climate. UC4 treated posts typically last 15–25 years. Hardwood posts (oak, sweet chestnut) last longer but cost significantly more. They're more often used for estate fencing, agricultural applications or premium garden settings. Green oak in particular continues to dry and harden after installation, making it extremely durable.
Concrete Posts
Concrete fence posts are more expensive upfront but last indefinitely. They're particularly popular in coastal areas of Northern Ireland where salt air accelerates timber decay. Concrete posts also hold panels more securely in high-wind areas, and many come with pre-formed slots to take gravel boards and standard panels. The main drawbacks are cost, weight (requiring two people to handle) and the fact that a damaged concrete post is harder to replace than timber.
Fence Post Size Guide
| Fence Height | Post Size | Post Length | Notes |
|---|---|---|---|
| 0.9m / 3ft panels | 75mm × 75mm | 1.8m total | 600–750mm in ground + 300mm gravel board |
| 1.2m / 4ft panels | 75mm × 75mm | 1.8m total | 600–750mm in ground |
| 1.5m / 5ft panels | 100mm × 100mm | 2.1m total | 600–750mm in ground |
| 1.8m / 6ft panels | 100mm × 100mm | 2.4m total | 600–750mm in ground, standard garden fence |
| 2.0m / 7ft panels | 100mm × 100mm | 2.7m total | Check planning permitted development limits |
| Agricultural/estate | 125mm × 125mm+ | Variable | Concrete or hardwood preferred |
Fixing Methods: Post Mix vs Wet Concrete vs Bolt-Down
- Post Mix (dry-pour concrete). The most popular DIY method. Pour the dry mix around the post, add water as directed, and it sets in the hole. Quick, easy and strong enough for standard domestic fencing. In Northern Ireland's wet ground conditions, the soil moisture often provides enough water, check the manufacturer's guidance. Works best in free-draining soils; in waterlogged clay it can be slow to cure fully.
- Wet-mixed concrete (1:2:4 mix). The traditional and most robust method. Mix ballast and cement to a stiff consistency, fill the hole and tamp around the post. Stronger than post mix for larger posts, exposed sites or security fencing. Requires slightly more effort but gives the best result in challenging NI ground conditions. Use rapid-hardening cement in very wet or cold conditions.
- Bolt-down / driven post spikes. Metal spikes driven into the ground with a post sledge or specialist driver tool. Quicker to install and removable if needed. Best suited to free-draining soils and not recommended on rocky ground or in very wet, soft soil where the spike can rock over time. Not suitable for exposed coastal or upland sites where wind loading is high. See fence post supports for compatible fittings.
- Gravel backfill (no concrete). Some post manufacturers recommend gravel backfill for wooden posts, arguing it drains better than concrete and reduces the standing water that rots the post base. It works well in free-draining soils but is not suitable for clay subsoils or areas with high water tables which are both common in Northern Ireland.
NI Ground Conditions
Northern Ireland has some of the highest average rainfall in the UK, and large areas sit on heavy clay subsoils that drain poorly. For domestic fence posts, wet-mixed concrete gives the most reliable results in our conditions as it fills the hole completely, sets hard regardless of soil moisture, and prevents the ground movement that works loose posts over time. Post mix is fine on sandy or free-draining soils; use wet concrete on clay.
Step-by-Step Installation Guide
Step 1: Mark Out the Post Line
Knock a timber peg into the ground at each end of your fence run and stretch a string line between them at the height your post tops will sit. This gives you a precise reference for post spacing, alignment and height throughout the whole run. Standard panel fencing uses posts spaced at 1.83m centres (to accommodate standard 1.8m wide panels). Mark each post position with a peg or spray paint. Check your measurements along the full length, if the run doesn't divide evenly into 1.83m panels, plan for a narrower infill panel at one end rather than trying to spread the posts unevenly. Check the string line is level using a line level or a spirit level held against the string. On sloped ground, decide whether you want a level fence (panels step down the slope) or a raked fence that follows the ground contour. Both are valid but require different planning.
Step 2: Dig the Post Holes
Use a post hole auger (also called a post borer or earth auger) for the cleanest, fastest results, available from tool hire shops throughout Northern Ireland. Alternatively, use a spade and a long-handled clamshell digger (post hole digger) for smaller numbers of holes. Hole depth should be at least one-third of the total post length, so a 2.4m post needs a minimum 600mm deep hole, ideally 750mm in soft or clay ground. Hole diameter should be around 3× the post size which is approximately 300mm for a 100mm × 100mm post. In Northern Ireland's clay soils, holes can fill with water quickly. If this happens, bail out the water before setting the post and work quickly. In very wet conditions, consider laying a 100mm layer of gravel in the bottom of the hole before setting the post. This keeps the end grain above standing water and significantly extends the post's life.
Step 3: Set the First and Last Post
Start with the two end posts. Drop the first post into its hole and check it's plumb (perfectly vertical) on two sides using a spirit level. Prop it temporarily with offcuts of timber or ask a helper to hold it while you check. Once plumb, fill around the post with your chosen fixing method: post mix, wet concrete, or gravel. For post mix, follow the product instructions: typically fill around the post with dry mix to 50mm below ground level, then add water and tamp. For wet concrete, work it in layers, tamping firmly with a length of rebar to eliminate air pockets. Form the concrete to a slight mound above ground level and slope it away from the post. This sheds water away from the post base rather than allowing it to pool at the timber. This is the single most effective thing you can do to extend post life in NI's wet climate. Set the second end post in the same way. Check both posts are the same height by holding a straight edge or checking against your string line. Allow the concrete to begin to firm (at least 2 hours for rapid-setting mix, overnight for standard concrete) before attaching panels or rails.
Step 4: Set the Intermediate Posts
With both end posts set, re-tension the string line between them at the post-top height. Use this as your height guide for all the intermediate posts. Set each post in turn, checking plumb on two faces and that the post top touches the string line. Space each intermediate post at exactly 1.83m centres from the previous one (or your planned spacing). Use a tape measure between post centres, don't rely on the hole spacing alone as holes can wander slightly. A small adjustment of the post position within the hole before the concrete sets is simple; adjusting a set post is not. Allow all posts to fully cure before loading them with panels or rails. Rapid-hardening post mix typically reaches working strength in 10–20 minutes but full strength in 24 hours. Standard concrete needs 24–48 hours minimum. Don't attach anything heavy until the concrete has properly cured.
Step 5: Install Gravel Boards
Gravel boards are horizontal timbers that sit at ground level between posts, keeping the base of the fence panels off the ground. This is particularly important in Northern Ireland where wet ground and lawn contact will rot the bottom of a panel within a few years. Fix 150mm × 22mm gravel boards into post slots (if using slotted concrete posts) or nail/screw them to timber battens fixed to the inside face of timber posts. The top of the gravel board should be flush with or just above ground level, the fence panel sits on top of it. Pressure-treated gravel boards should be used throughout as untreated boards in ground contact will fail quickly. Concrete gravel boards are also available and will last indefinitely.
Step 6: Fit the Fence Panels or Rails
For panel fencing, drop each panel into the slot between posts (for concrete slotted posts) or position it against the posts and fix with galvanised panel clips or screws through the panel frame into the post. Check each panel is level before fixing. Use panel clips rather than screwing directly through the panel if the fence is in an exposed position, clips allow the panel to flex slightly in wind rather than splitting. For post-and-rail fencing, fix rails to the posts using galvanised joist hangers, mortise joints or by notching the post face. Three rails are standard for stock-proof fencing; two rails work for lighter applications. Ensure all fixings are galvanised or stainless steel, standard steel screws and nails will rust through within a few years in NI's damp conditions. Add post caps to all exposed post tops. Flat or angled caps shed rainwater and prevent end-grain rot, which is the primary cause of premature post failure. This small addition can add years to post lifespan.
Step 7: Treat and Finish
Apply a quality exterior wood preservative or fence stain to all exposed timber surfaces, posts, gravel boards and panels. Pay particular attention to end-grain cuts, which absorb moisture rapidly. In Northern Ireland's climate, annual treatment is recommended for softwood fencing to maintain appearance and protection. Check the fence for any loose nails or protruding fixings and knock or trim them flush. Run your hand along the top of any closeboard or featheredge panels to check for splinters. Check that the fence line is straight by sighting along it from one end. Minor adjustments to panel positions can usually be made by gently easing them in their fixings before fully tightening.
Common Mistakes to Avoid
- Posts too shallow. The most common cause of fence failure. In NI's wet ground, posts need at minimum one-third of their length in the ground and ideally more on exposed or soft sites. A 1.8m fence post should have at least 600mm in concrete.
- Concrete pooling at the post base. Flat or dished concrete around a post collects water against the timber. Always mound and slope the concrete away from the post. This simple step dramatically extends post life.
- Using the wrong post size. 75mm × 75mm posts are fine for 1.2m fence boards; 1.8m panels need 100mm × 100mm as a minimum. Undersized posts will flex and work loose over time, especially in NI's windy conditions.
- Not checking plumb on two faces. A post that looks vertical from the front may lean significantly side-to-side. Always check plumb on both the face and the edge.
- Fixing panels before concrete cures. Adding weight and wind loading before the concrete sets can shift posts before they're fixed. Wait at least overnight, 24 hours is better.
- Standard steel fixings. Uncoated steel screws and nails will rust through within 2–3 years in NI's climate. Always use galvanised, stainless steel or other corrosion-resistant fixings. It costs a little more but the difference in lifespan is enormous.
- No gravel boards. Panels sitting on damp ground will rot from the bottom up regardless of how well treated they are. Gravel boards are not optional in Northern Ireland, they're essential.
Frequently Asked Questions
As a minimum, one-third of the total post length. For a standard 2.4m post (for a 1.8m fence), that's at least 600mm, ideally 750mm in soft, clay or waterlogged ground. Northern Ireland's wet climate and clay soils mean posts are under more stress from ground movement and water than in drier areas of the UK.
The most common causes are: posts not deep enough, concrete not properly consolidated around the post (leaving voids), flat concrete at the post base that holds water, or the original installation done in very wet conditions where the concrete never fully cured. For a leaning post, the best fix is to excavate around the base, re-plumb the post, and re-concrete with properly mixed material.
It's not ideal but it's manageable. The main risks are water-filled holes (bail them out before filling), wet concrete being diluted and weakened, and soft ground making it harder to keep posts plumb during curing. Use rapid-hardening cement in wet conditions and prop posts firmly while the mix sets. Avoid installing in frozen ground, the ground will shift as it thaws and can move newly set posts.
Solid close-board or panel fencing acts like a sail in strong winds, the entire fence load goes into the posts. For exposed or coastal sites, consider a more open style: hit-and-miss fencing (alternate boards with gaps), post-and-rail with horizontal boards, or trellis panels that allow wind through. Whatever style you choose, post sizing and depth are critical on exposed sites, go larger and deeper than you think you need.
If you're using properly UC4 pressure-treated posts, additional treatment before installation isn't necessary for the main post body. However, any cuts you make (trimming to height, for example) will expose untreated timber end grain. Apply a liberal coat of end-grain timber preservative to any fresh cuts before installation. This is particularly important for the post top and the base, which are most vulnerable to water ingress.
Ready to Get Your Fence Posts In?
MacBlair stocks UC4 pressure-treated fence posts, concrete posts, post mix, rapid-hardening cement, gravel boards, panels and all the fixings you need. Available at branches across Northern Ireland. Visit MacBlair.com or call into your nearest branch for expert advice and competitive trade pricing.