



How to Build a Garden Wall: A Step-by-Step DIY Guide
A well-built garden wall earns its place in the garden ten times over. It defines a boundary, creates a raised bed, holds back a slope, and adds a sense of structure that no fence can match. Done properly; a garden wall will last decades with very little upkeep.
The good news is that a straightforward decorative wall, up to about 600mm tall, is well within reach of any competent DIYer. Retaining walls (the kind that hold back soil on a sloped garden) are a step up in complexity, but the same fundamentals apply.
This guide covers planning and regulations, choosing the right materials, foundations, mortar mixes, and a step-by-step build for a standard concrete-block garden wall. We’ll also cover the extra steps you need for a retaining wall. Including drainage, weep holes and tying back into the bank. So you can apply the same skills to a sloped NI garden.
Before you start
A few rules worth knowing before you put a spade in the ground:
- In Northern Ireland, you don’t usually need planning permission for a garden wall, but there are limits: walls next to a road must not exceed 1 metre in height; elsewhere on your property the limit is 2 metres without permission.
- Listed buildings, conservation areas and Article 4 directions can change those limits. Check with your council if you’re in any doubt.
- Walls over 1 metre tall, or any retaining wall, may need to comply with Building Regulations Part A (structure). Get advice if you’re building anything significant.
- Boundary walls between properties: confirm where the line actually runs before you build. Walls on a shared boundary need both owners’ agreement in writing.
- Drainage matters. Retaining walls without weep holes or drainage behind them will fail. Water pressure pushes them over.
Types of Garden Wall and Which to Choose
Garden walls come in several flavours. Picking the right one upfront saves a lot of rework.
- Low boundary wall (up to 600mm): The most common DIY job. Defines a front garden or path, can be built in concrete blocks (rendered) or facing brick.
- Raised bed wall: A short retaining wall (300–500mm) holding soil for planting. Needs drainage behind so it doesn’t saturate over winter.
- Retaining wall: Holds back a sloped garden. Anything over 600mm holding back significant soil is a serious bit of construction. Get professional input on anything over 1 metre.
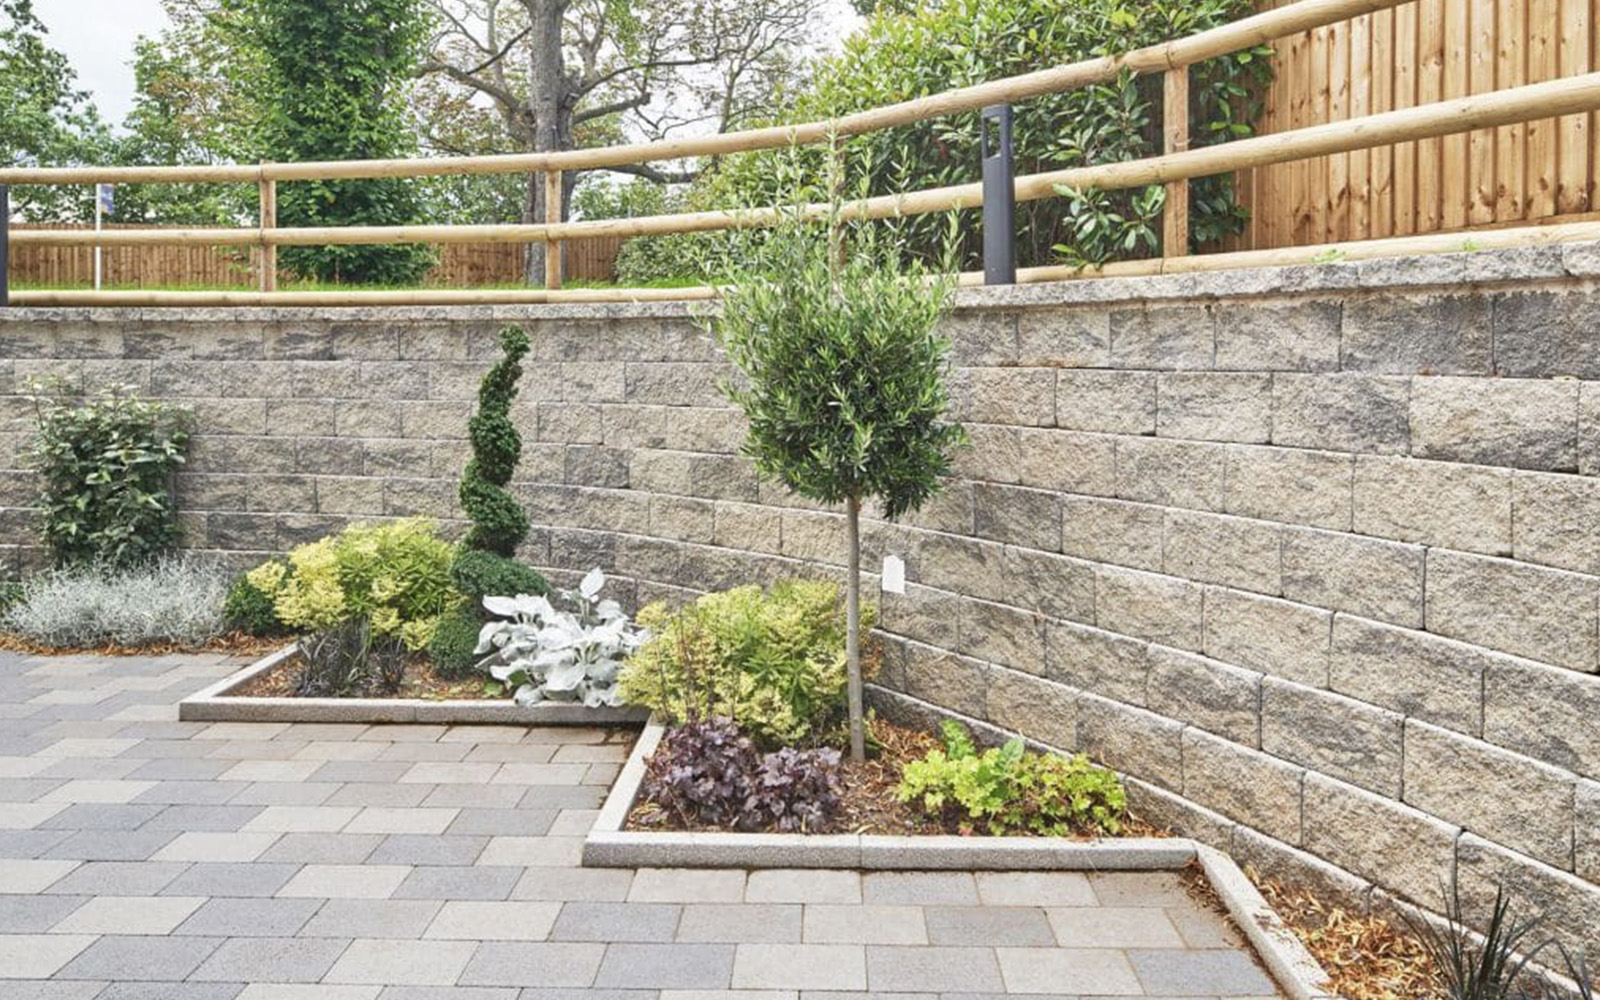
- Decorative walling: Concrete walling stones in a stone-effect finish. Quick to lay, attractive, and great for low garden walls and raised beds.
- Privacy or screen wall: Taller walls (1.5m+) for privacy or shelter. Needs piers every 3 metres and proper foundations.
Choosing Your Wall Material
The material you pick affects the look, the cost, and how much skill the build needs. Here’s a quick overview of the main options:
- Concrete blocks (rendered): The most common choice for boundary walls in NI. Quick to lay (one block = three bricks’ height), strong, and rendered with sand and cement to finish. Affordable.
- Facing brick: More attractive than rendered block but slower and more skilled to lay. Excellent durability if you choose a frost-resistant brick. Important in NI.
- Decorative concrete walling stones: Pre-cast in stone-effect finishes. Lay like blocks. A great middle ground between cost and looks for raised beds and low garden walls.
- Natural stone: Beautiful and characterful but the most expensive option, and a real skill to lay well. Best left to experienced builders for anything tall.
- Railway sleepers: A quick and attractive option for low retaining walls and raised beds. Different technique. See our separate guide on building a raised bed with sleepers.
What You’ll Need
List below covers a standard rendered-block boundary wall. Adjust quantities for facing brick or decorative walling stones.
| Tools | Materials |
|---|---|
|
|
Mortar and concrete mixes. A quick reference
- Mortar for blockwork: 4 parts building (soft) sand to 1 part cement. Add a plasticiser for workability.
- Mortar for facing brick (NI exposure): 3 parts building sand to 1 part cement, plus plasticiser. Stronger to handle wet weather.
- Concrete for footings: Use a C20 mix. 1 part cement, 2 parts sharp sand, 4 parts 20mm aggregate. Or order ready-mix for anything over 0.5m³.
- Render: 3 parts sharp sand to 1 part cement, plus plasticiser. Apply in two coats. Scratch coat and finish coat.
How to Build a Garden Wall: Step by Step
Below is the standard sequence for a rendered concrete-block wall up to 600mm tall on a domestic boundary. Work through the steps in order and don’t skip the foundation.
STEP 1: PLAN AND MARK OUT
Decide the line and length of the wall. Mark it with string lines pulled tight between pegs at each end and at any corners. Use a builder’s square (or the 3-4-5 triangle method) to set 90° corners. Double-check measurements before you dig.
Plan your block layout on paper first. This is called a “bond.” For a single-leaf wall in 215 x 100 x 65mm blocks, a half-bond pattern (each course offset by half a block) is standard. It looks neat and avoids continuous vertical joints which weaken the wall.
STEP 2: DIG THE STRIP FOUNDATION
Dig a trench under the line of your wall. As a rule of thumb, the foundation should be twice as wide as the wall and at least 300mm deep. Going down to firm, undisturbed subsoil. For a 100mm wide wall, that’s a 200mm wide trench.
In NI, the high frost penetration depth and clay-heavy soil mean a 300–450mm deep foundation is sensible for any wall over 600mm. Don’t skimp on the depth. Settlement cracks in the wall almost always come from a thin or shallow footing.
STEP 3: POUR THE CONCRETE FOOTING
Mix a C20 concrete (1 cement : 2 sharp sand : 4 aggregate) or order ready-mix for larger jobs. Pour into the trench to a depth of 150–200mm, then tamp and level off.
Use a long spirit level on a straight piece of timber to level the top of the footing. The top should sit roughly 150mm below ground level so your first course of blocks finishes near grade. Allow 24–48 hours to set before laying blocks on top.
STEP 4: LAY THE FIRST COURSE
Mix mortar (4 sand : 1 cement) to a smooth, workable consistency. Lay a string line along the front face of the wall at the height of the top of the first course. Trowel a 10–15mm bed of mortar onto the footing and lay your first block, tapping it down with the handle of the trowel until the top sits on your string line.
Check level both ways with a spirit level. Butter the end of each subsequent block with a layer of mortar (the “perp end”) and butt it up tight to the previous one. Carry on along the wall, checking level and line every block.
If your wall is over 600mm long, lay a damp proof course (DPC) strip on top of the first course of blocks before laying the second. This stops rising damp travelling up the wall in NI’s wet climate.
STEP 5: LAY SUBSEQUENT COURSES
Lay each course in a half-bond pattern. Every block offset by half a block from the one below. This means starting alternate courses with a half block at the end. Cut half blocks with a bolster chisel and lump hammer, or score with a disc cutter for cleaner cuts.
Raise the string line at every course. Check level and plumb (vertical) at every course with a spirit level. Don’t lay more than 4–5 courses in one go. Let each section set up before adding more weight on top, or you risk slumping.
STEP 6: BUILD PIERS (FOR TALLER OR LONGER WALLS)
Walls over 1 metre tall, or longer than around 3 metres, need piers. Thicker square columns built into the wall every 3 metres for stability. A pier is built using two blocks side by side, bonded into the wall in alternate courses.
For a freestanding wall over 1.5m, also tie alternate courses with wall ties or stainless steel reinforcement. Take advice on anything taller than 1.8 metres. It’s a structural job.
STEP 7: ADD THE COPING
Coping stones cap the top of the wall and stop water soaking down into the blockwork. Vital in NI’s wet climate. Bed them on a 15mm layer of mortar with a slight weather-shed (5–10° slope) so water runs off cleanly.
Choose a coping that matches your finish: smooth concrete or chamfered for a clean modern look, twice-weathered or pier caps for a more traditional finish.
STEP 8: POINT, RENDER OR LEAVE FAIR-FACED
If you’re leaving the wall as fair-faced blockwork, point the joints with a jointer when the mortar is thumb-print firm. This is normally an hour or so after laying. Use a half-round bucket-handle profile for a tidy, weather-shedding joint.
If you’re rendering, wait a few days for the wall to set, then apply a scratch coat (3 sharp sand : 1 cement plus plasticiser) at around 10mm thick. Scratch the surface with a comb to give the finish coat something to key into. Allow the scratch coat to set for 24 hours, then apply the finish coat at 5–8mm and float to a smooth finish.
Render is typically applied in dry weather above 5°C. Frost will ruin a fresh render. April–September is your safest window in Northern Ireland.
Building a Retaining Wall: Extra Considerations
If your wall is holding back soil on a slope, you need to plan for water pressure as well as weight. Anything over 1 metre tall holding back soil should be designed by an engineer. The forces involved are significant.
- Drainage behind the wall: Lay a 100mm perforated pipe along the back of the wall at footing level, surrounded by 200–300mm of clean 20mm gravel. Wrap with geotextile membrane to stop silt clogging it.
- Weep holes: Leave open vertical joints (or insert plastic weep vents ) every 1 metre along the second course. These let water that gets through the drainage gravel escape, rather than building up behind the wall.
- Wider footing: A retaining wall needs a footing roughly two-thirds of the wall height in width. A 1m retaining wall needs a 600–700mm wide footing. Much more than a freestanding wall.
- Tie-backs (for taller walls): Walls over 1 metre often need geogrid tie-backs into the slope, or a step-back design. This is structural. Get a professional involved.
- Backfill the right way: Backfill behind the wall with free-draining material (gravel near the wall, then topsoil), not the original clay. Compact in 200mm layers as you go.
Garden Wall Ideas to Inspire Your Project
Beyond pure boundary walls, here are a few ways homeowners across NI are using walling to add character to their gardens:
- Low rendered walls painted in a soft grey or off-white as a contemporary front-garden boundary.
- Natural stone-effect walling stones used as a curved raised bed feature.
- A dry stone-style retaining wall on a sloped back garden, planted into the joints with sedums and alpines.
- Painted blockwork walls used as a backdrop for outdoor lighting and climbing plants.
- Brick boundary walls with a brick-on-edge coping detail for a traditional finish.
Common Mistakes to Avoid
- Skimping on the foundation: The single most common cause of garden walls cracking. Always go down to firm subsoil, twice the wall width, with a 150–200mm concrete footing.
- No DPC: In a damp NI climate, rising damp will travel up untreated blockwork. A simple DPC strip on the first course solves it.
- No coping: Without a coping, water gets into the top of the blockwork, freezes, and cracks the wall over a few NI winters.
- Wrong mortar mix: A 4:1 mix is right for blockwork. Don’t use stronger mixes (1:3) on a soft wall. It cracks the blocks rather than the joints when the wall moves slightly.
- Building too tall without piers: A single-leaf wall over 600mm tall needs piers or it’ll move in the wind. Don’t guess. Plan piers in from the start.
- Retaining walls without drainage: Water pressure behind a retaining wall is enormous. No drainage = wall failure within a few years.
Frequently Asked Questions
Generally no, as long as the wall is under 1 metre next to a road or under 2 metres elsewhere on your property. Conservation areas, listed buildings and Article 4 directions can change this. Always check with your council.
A standard rule of thumb is twice the wall width and at least 300mm deep, going down to firm subsoil. For walls over 600mm in NI’s frost-prone clay soils, 450mm deep is safer.
A 100mm dense concrete block is the standard choice for a single-leaf rendered wall. Frost-resistant facing bricks are the go-to where you want a brick finish. For raised beds and low decorative walls, concrete walling stones are quick and attractive.
Mortar reaches full strength in around 28 days, but it’s firm enough to lay further courses on within an hour or two and hard enough to point after 24 hours. Don’t apply heavy loads or render for at least 48 hours.
A retaining wall up to about 600mm holding back light soil is a sensible DIY project if you include proper drainage and a wide footing. Anything over 1 metre, or holding back significant soil, should be designed by a structural engineer.
Get Your Walling Materials from MacBlair
MacBlair stocks everything you need for a garden wall. Concrete blocks, facing bricks, decorative walling stones, coping, cement, sand, aggregate, DPC, render mix and the tools to lay them. Our team across our Northern Ireland branches can help you calculate quantities, choose the right block or brick for your finish, and answer your questions before you start the job.
Visit your nearest MacBlair branch or browse our walling and aggregates range online at MacBlair.com.
→ Shop Walling, Bricks & Cement at MacBlair.com